 11:50
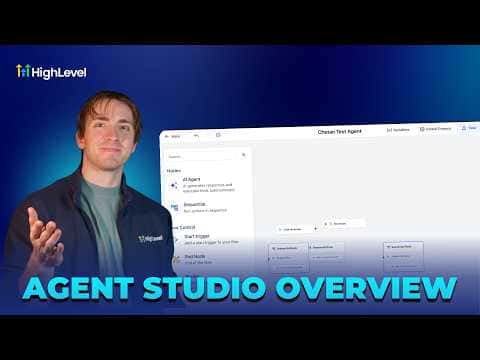
11:50概要. This tutorial gives a detailed walkthrough of Agent Studio inside GoHighLevel, covering the visual canvas, trigger types, AI agent nodes versus sequential action nodes, the router branching tool, variable types (global, input, and runtime), and API call configuration. It also shows how to use the Build with AI prompt box to generate an agent from a natural-language description, and how to test and deploy the finished agent within a sub-account.
学べること
- Navigate to Agent Studio and choose between building from scratch or using a pre-built template
- Understand the difference between AI agent nodes (autonomous, tool-using) and sequential nodes (deterministic steps)
- Use the router tool to create conditional branches inside an AI agent node
- Set global, input, and runtime variables and understand when to use each
- Configure API call nodes with headers, tokens, and JSON payloads
- Generate an agent from a plain-language prompt using the Build with AI feature
ステップ
Open Agent Studio
Go to AI Agents in your sub-account and select Agent Studio. Click Create Agent in the top right to start fresh, or browse the template library for pre-built agents such as customer support, lead qualification, or content generation.
Preview and import a template (optional)
Click Preview on any template to see the full canvas before committing. Click Choose Template to import it into your workspace for editing.
Set the trigger node
Every agent starts with a trigger. Choose from chat message, form submitted, lead tag applied, or workflow invoke. The trigger determines what fires the agent and what initial data it receives.
Add an AI agent node and write a prompt
Add an AI agent action from the nodes panel. Write a prompt that describes the specific task this node should accomplish. Select the AI model, and choose conversational mode if the agent needs to ask questions, or task-based mode if it just needs to complete an action silently.
Add tools to the AI agent node
Tools extend what an AI agent node can do. Add a router tool to create conditional branches based on the agent's output. Add an API call tool to send or receive data from external services. Each tool is configured directly inside the node.
Configure variables
Click Variables at the top of the canvas. Global variables hold fixed values like API tokens and location IDs that stay the same across every run. Input variables are values passed in when the agent is triggered. Runtime variables are values the agent creates or collects during a run.
Use Build with AI to generate a starting point
Instead of building manually, type a plain-language description of what you want the agent to do. Agent Studio will generate a canvas with nodes and connections as a starting point you can then refine.
Test and deploy
Use the built-in test chat to run the agent and review its output. Once satisfied, deploy it and connect it to the trigger source (for example, a funnel form or a workflow step) so it runs automatically in production.
ヒント
- Use task-based mode for nodes that perform actions silently. Use conversational mode only when the agent needs to ask a follow-up question.
- Store API tokens and location IDs as global variables so you update them in one place if they change.
- Start with a template and modify it rather than building from scratch when your use case is close to an existing one.