 5:01
5:01概要. Sending all your email from a single domain means that a bounce spike in your bulk campaigns can drag down the reputation of your transactional and workflow emails too. GoHighLevel's LC Email system lets you register multiple dedicated domains in one sub account and route each email type through a separate domain. This tutorial covers adding and verifying additional domains, entering the DNS records at your registrar, and using the Domain Configurator to assign each domain to its intended sending role.
学べること
- Why separating bulk, one-on-one, and workflow emails across domains protects deliverability
- How to add and verify a second or third sending domain in GoHighLevel
- How to configure DNS records for each new domain
- How the Domain Configurator assigns a domain to a specific sending type
- How to troubleshoot a domain that shows as unverified after DNS changes
ステップ
Go to Dedicated Domain and IP in Email Services
Open Settings in your sub account, click Email Services, then select Dedicated Domain and IP. You will see any domains already configured.
Add a new domain
Click Add Domain in the top right, type the subdomain you want to use for this sending type (for example, workflow.yourdomain.com), then click Add and Verify. GoHighLevel will show a Continue prompt before loading the DNS record screen.
Create the DNS records at your registrar
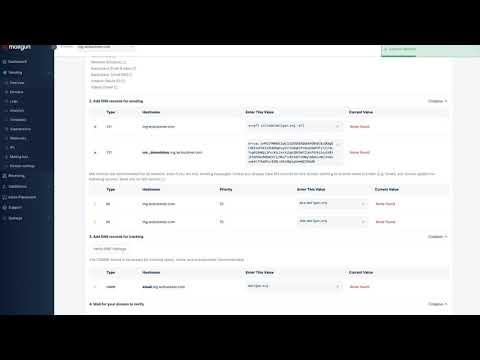
GoHighLevel provides a TXT record, two MX records, and a CNAME. Log in to your domain registrar or DNS provider and add all four. Use only the subdomain portion as the host name for each record, not the full domain. Save each record before moving to the next.
Verify the domain
Return to GoHighLevel and click Verify Domain. If it shows as not verified, wait a few minutes and click again. Registrars vary in propagation speed, so patience helps here.
Assign domains in the Domain Configurator
Once all your domains are verified, open the Domain Configurator tab. Set your bulk email domain for mass sends, your one-on-one domain for direct contact conversations, and your workflow domain for automated sequences. Save the configuration.
ヒント
- Name your subdomains clearly (bulk.yourdomain.com, direct.yourdomain.com, workflow.yourdomain.com) so the purpose is obvious when you review settings later.
- SSL may show as pending briefly after verification. Click Verify Domain again after a minute and it typically resolves on its own.